
How to Register Your Official Company Email for Free
A professional email address builds credibility and trust with your customers. Our team can set it up for you, or you can do it yourself.
Instead of using generic email providers like Gmail or Yahoo, you can create official company emails that match your domain (like info@yourbusiness.com or support@yourbusiness.com).
There are two ways to get your professional email setup. See options below.
Option 1: Let Our Technical Team Handle It

If you'd like the Unywebs technical team to handle this process for you, simply complete a new Zoho email request form using the link below:
New Zoho Email Setup Request Form
Once submitted, give us up to 1 business day to create this for you. This is perfect if you prefer a hands-off approach and want professional setup without the technical work.
Option 2: Set It Up Yourself (DIY)
If you prefer to do it yourself, here's the complete step-by-step process.
What You Need
- An active domain with DNS access
- Valid mobile number for verification
- Email address for verification

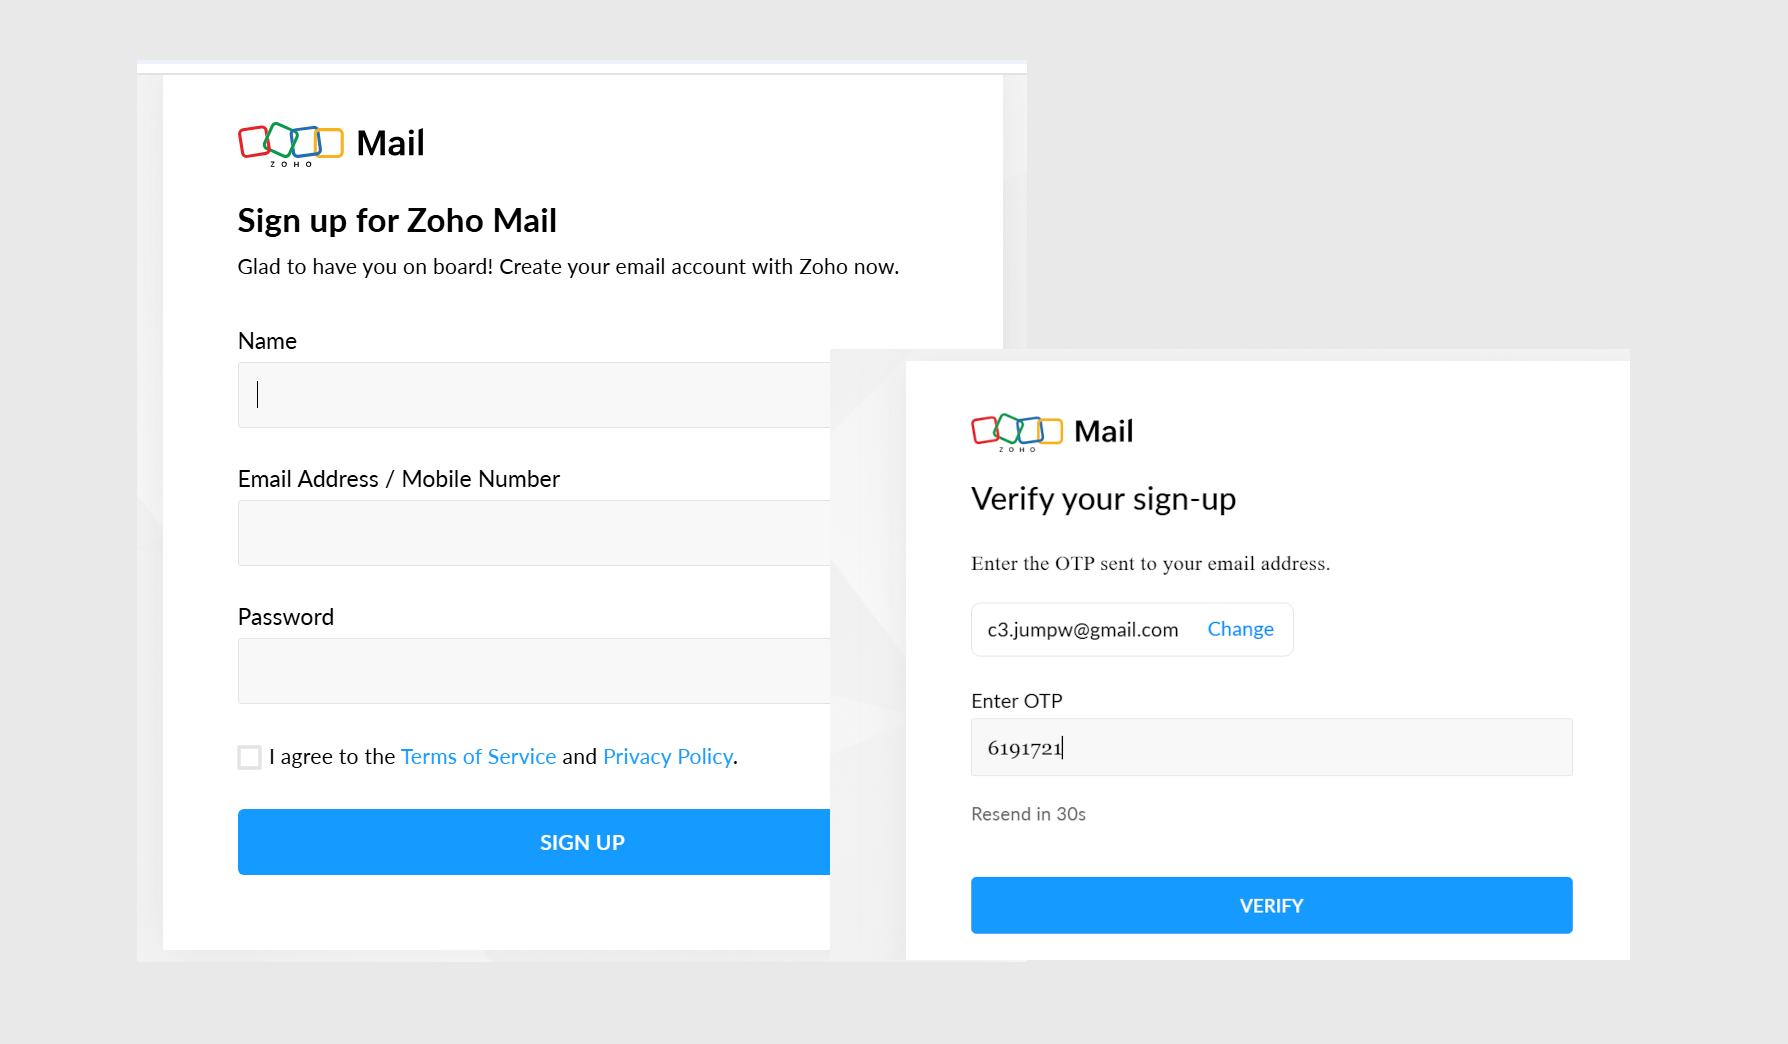
Step 1: Create Your Zoho Mail Account
- Visit the Free Zoho Mail page here
- Fill in the required details and click "Sign Up" to create your account
- Enter the seven-digit verification code sent to your registered mobile number
Step 2: Add Your Domain
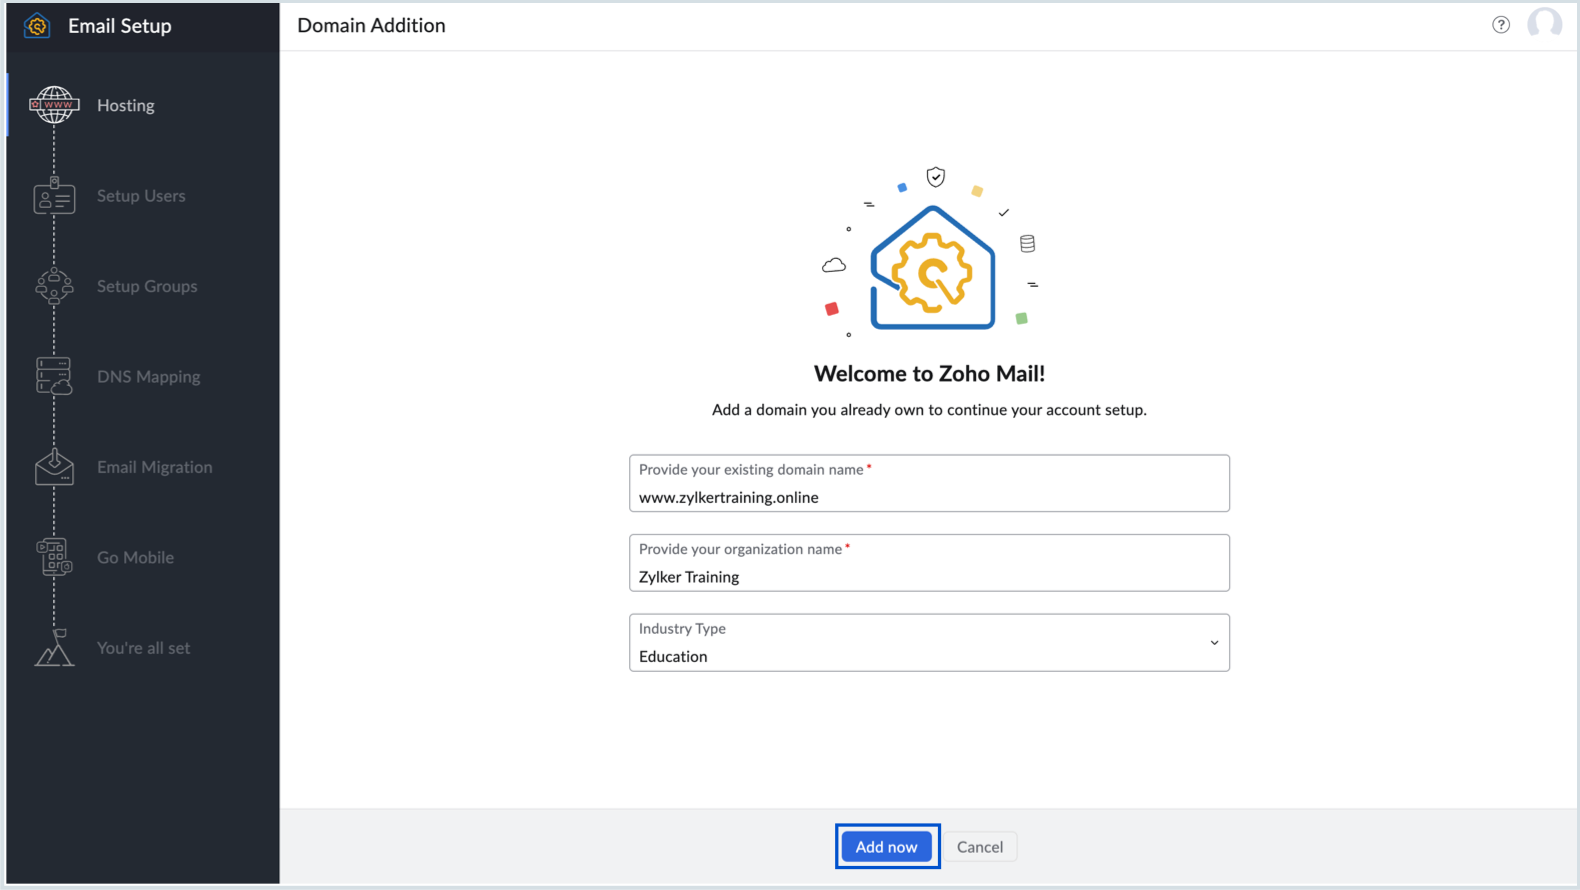
Using a Domain You Already Own:
- Click "Add now" under the "Add an existing domain" section
- Provide your domain address (example: yourbusiness.com)
- Enter your organization name (this will be used for all future references)
- Click "Add now" to proceed
Need to purchase a new domain to use for your email? Click here
Step 3: Verify Domain Ownership
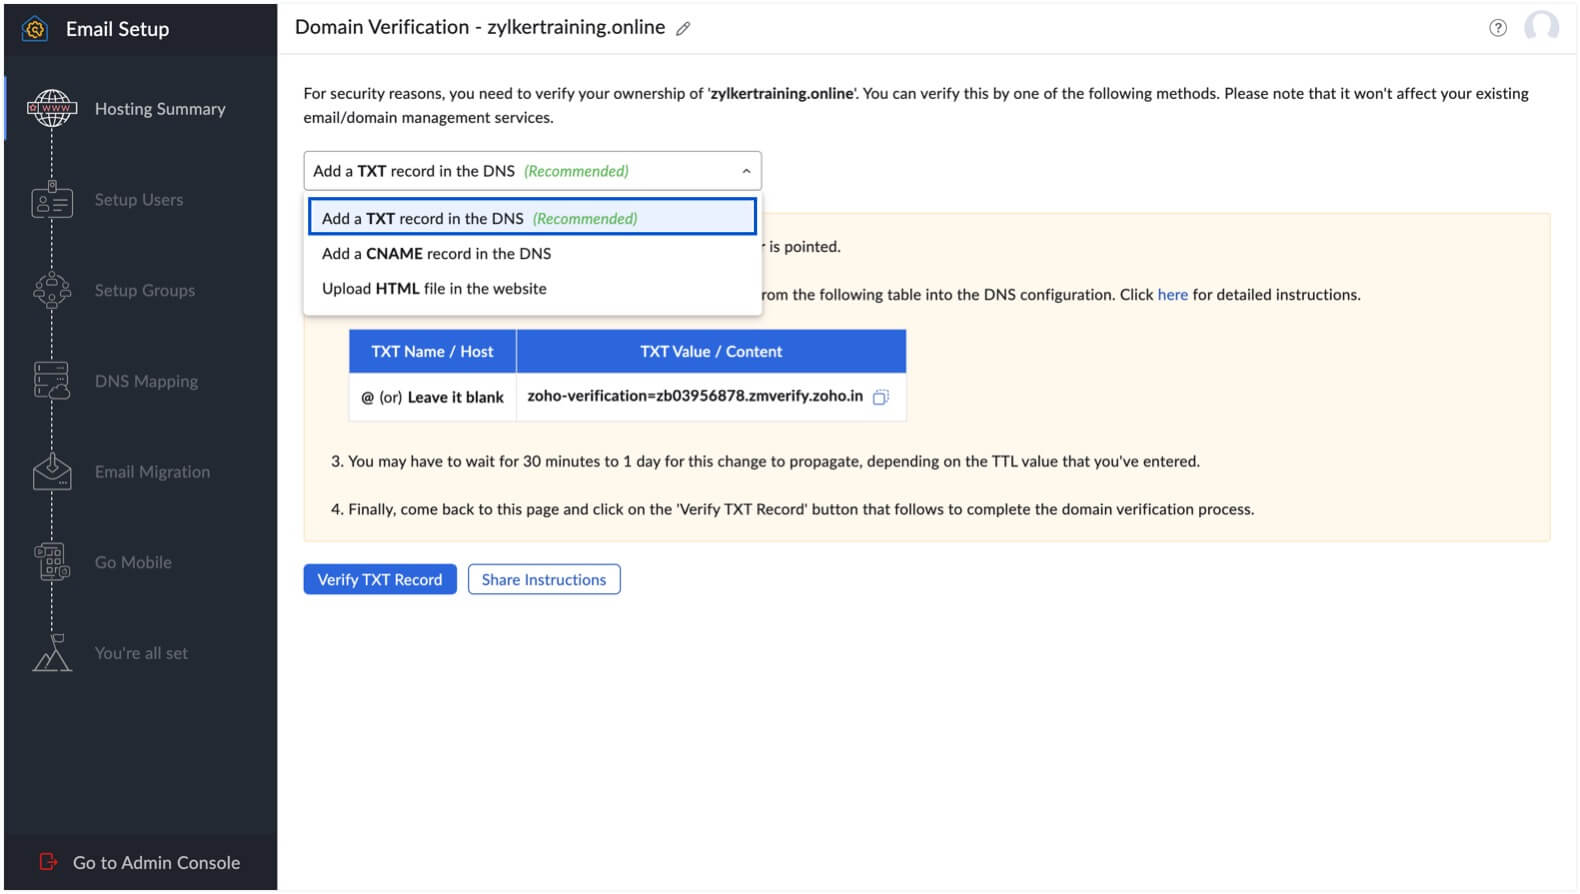
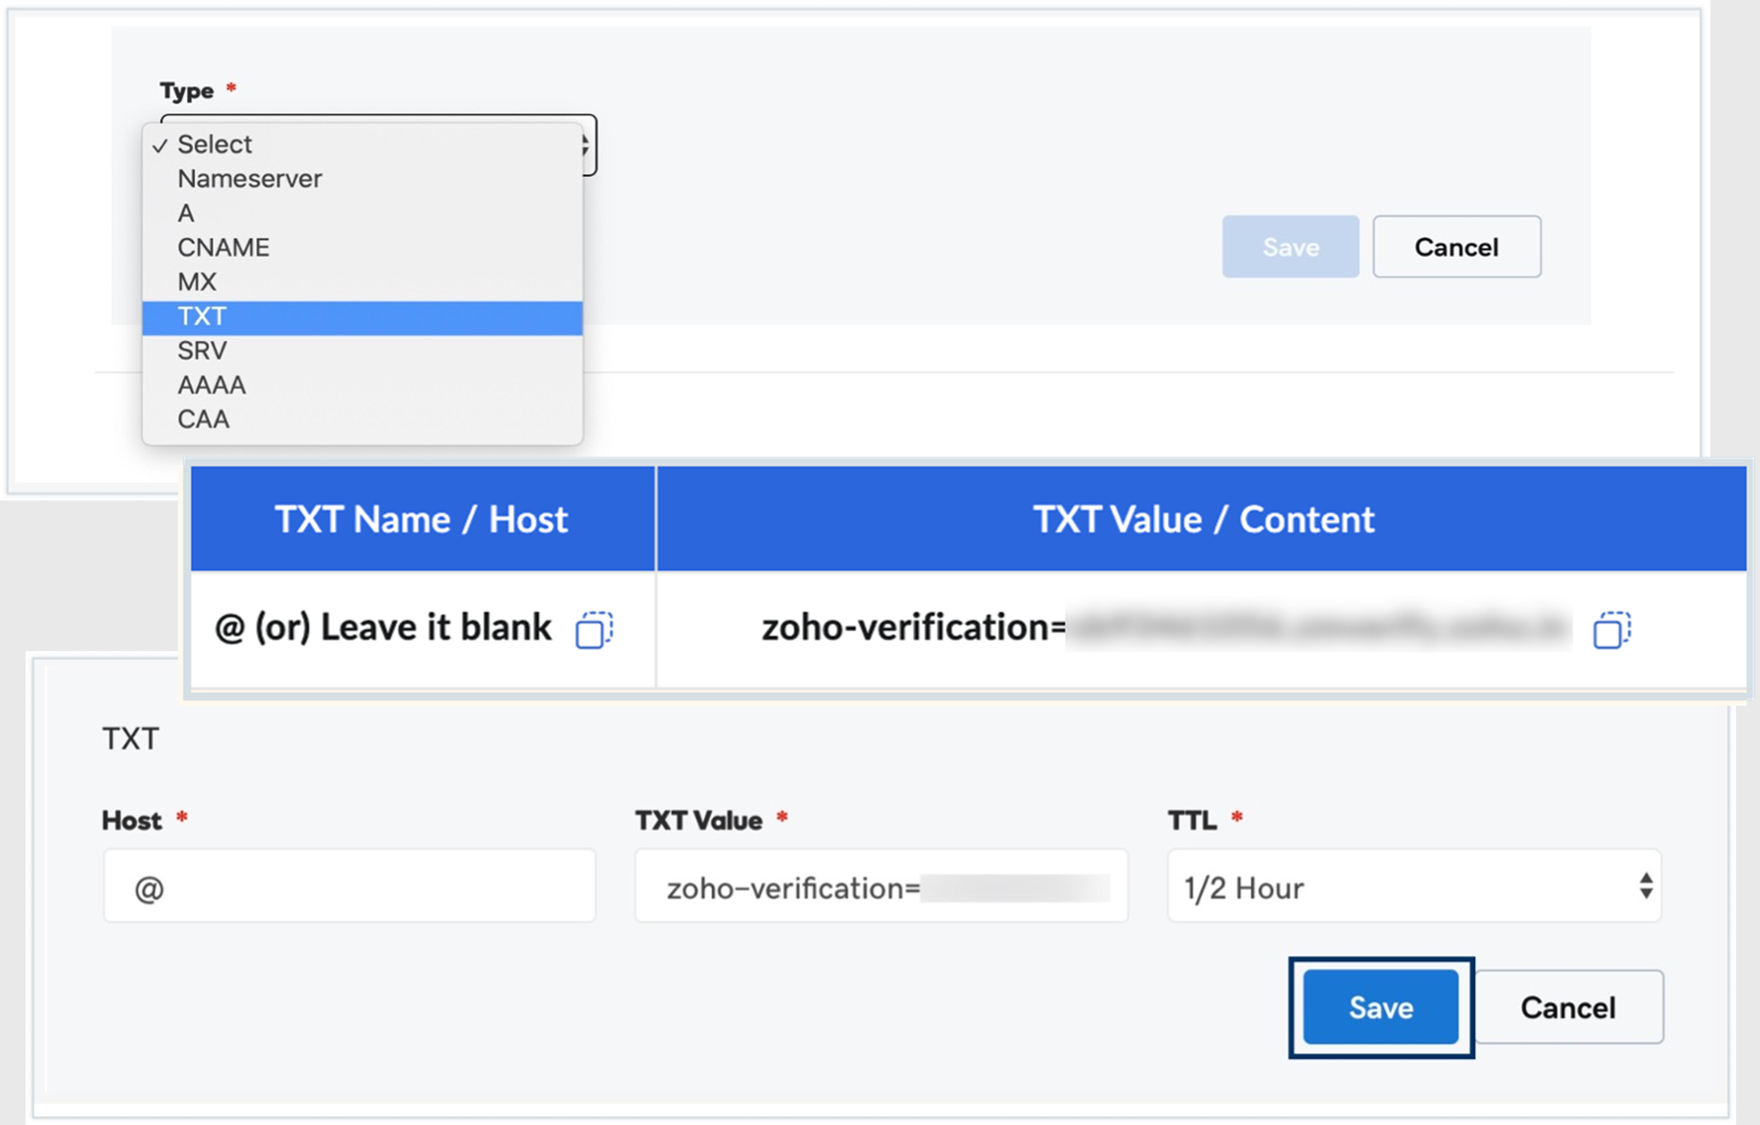
Choose one of three verification methods:
Method 1: TXT Record Verification
- Select "Add a TXT record in the DNS" from the dropdown
- Sign in to your Domain Registrar's account in a new tab
- Navigate to the DNS Management page
- Add a new TXT record:
- Host field: Leave blank, enter "@", or your domain address
- Value field: Copy the unique verification code from Zoho
- TTL: Choose shortest time available for faster verification
- Save the record and wait 1–2 hours
- Click "Verify TXT Record" on Zoho's setup page
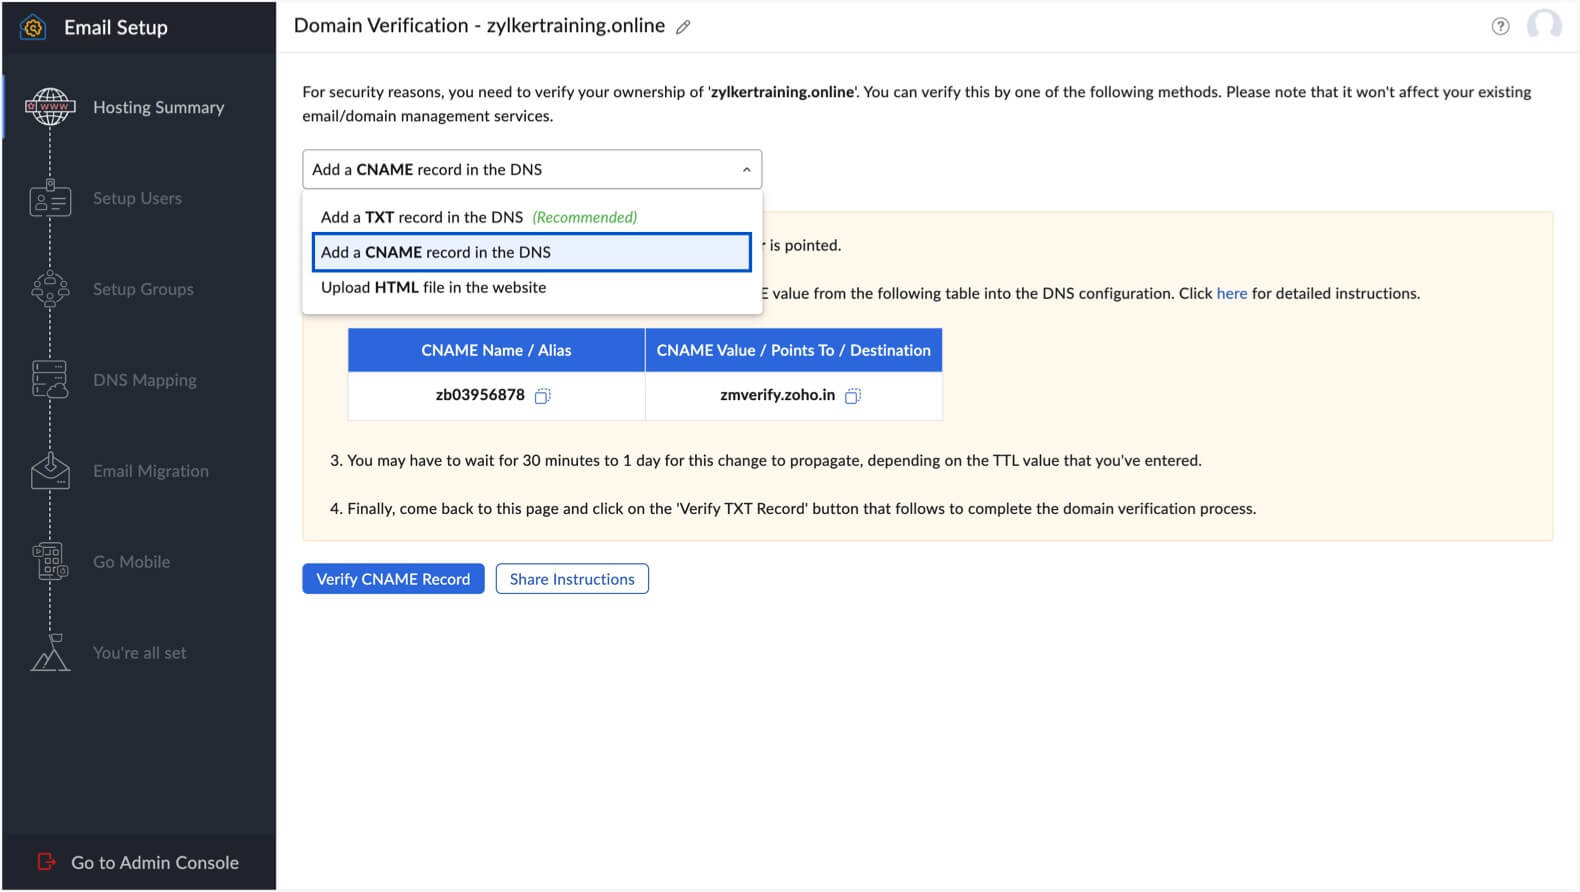
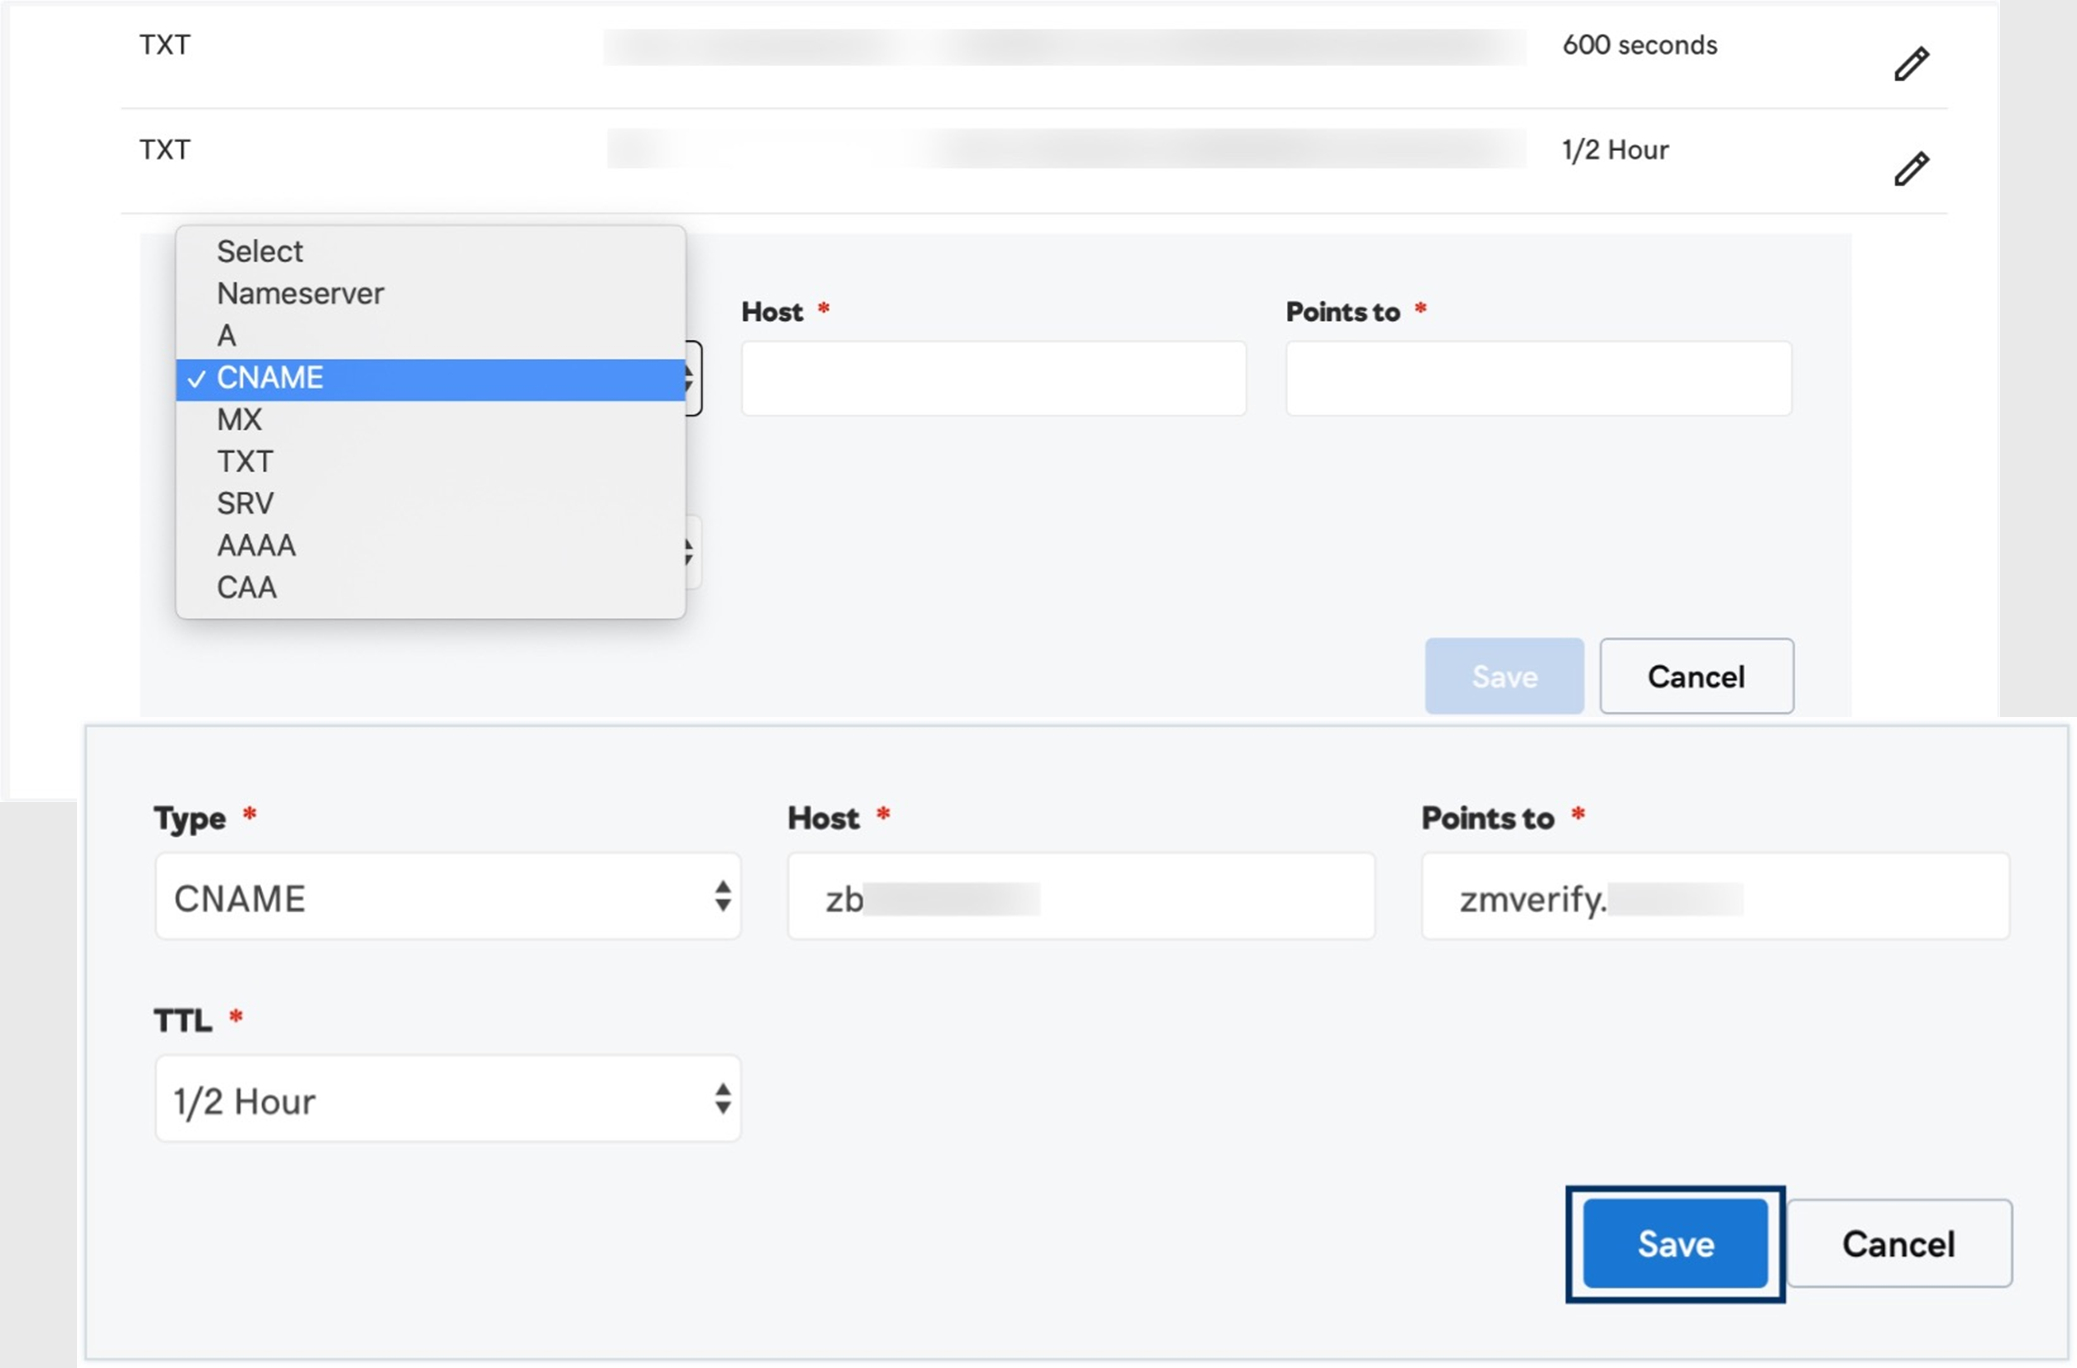
Method 2: CNAME Record Verification
- Select "Add a CNAME record in the DNS" from the dropdown
- Access your Domain Registrar's DNS page
- Add a new CNAME record:
- Host field: Copy the unique host value from Zoho
- Points to field: Enter the provided Zoho address
- TTL: Set to shortest available time
- Save and wait 1–2 hours before verifying
Step 4: Organization Setup and User Management
Create Your First User (Super Administrator)
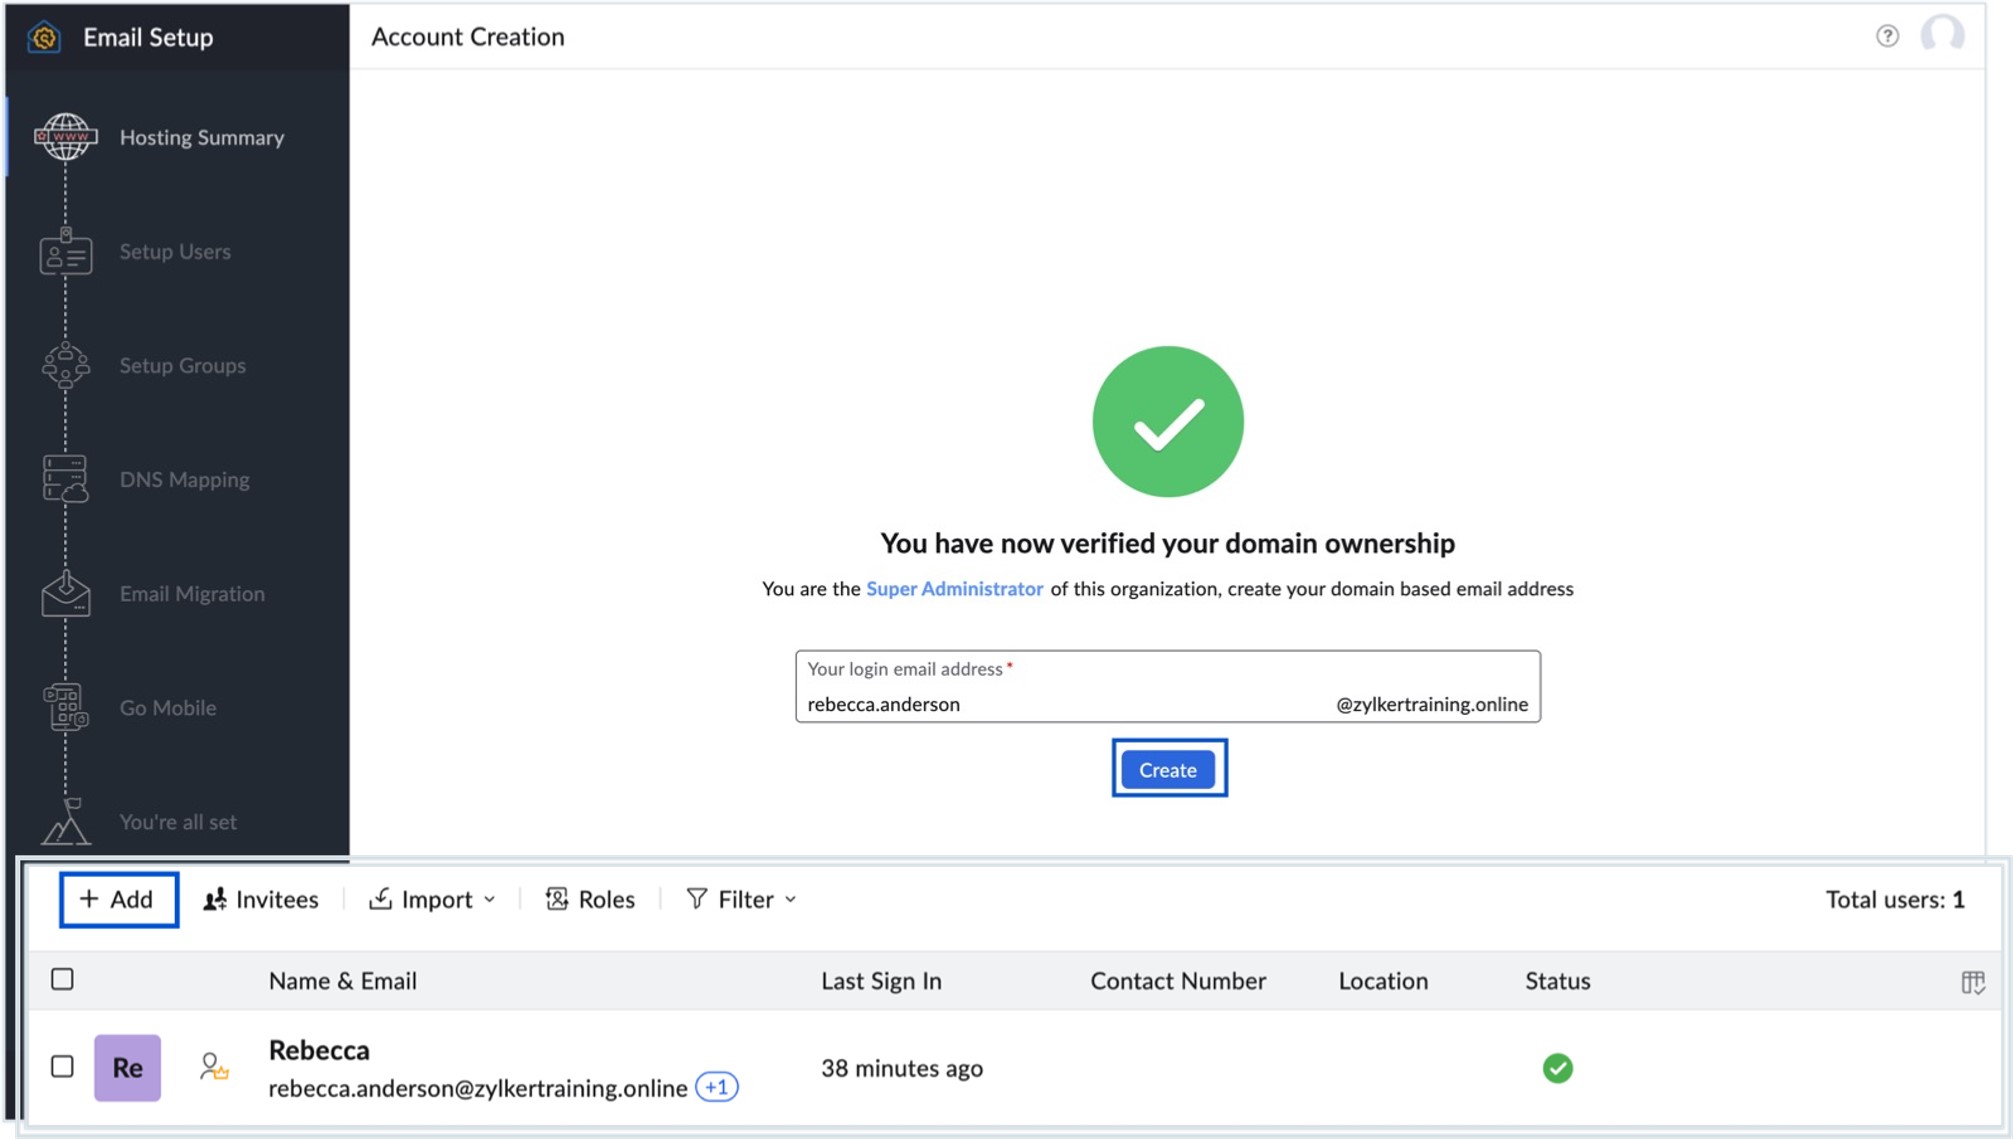
- Provide a name for the first user account
- Click "Create". This user becomes the super administrator.
- Access the Users page to add additional team members
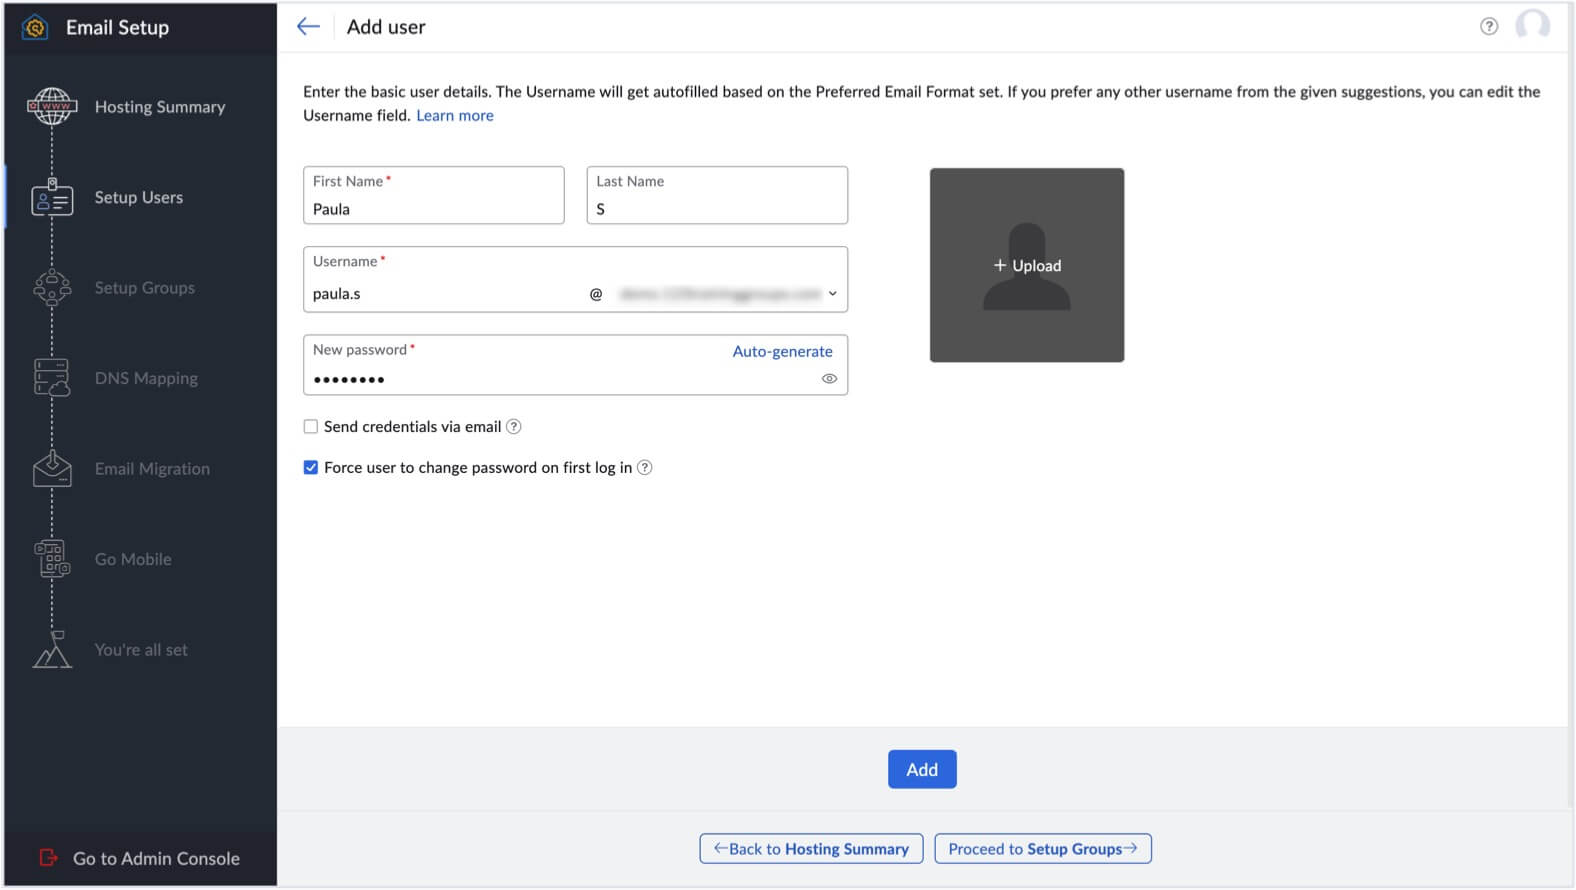
Adding Users to Your Organization
- Click "Add" button
- Enter First Name and Last Name (username auto-populates)
- Create password: Manual entry or click "Auto-generate" (must have 8+ characters with uppercase, lowercase, number, and special character)
- Security options: Check "Force user to change password during first login" for security. Check "Send credentials via email" to share login details (up to 5 recipients)
- Click "Add" to create the account
Step 5: Critical DNS Configuration
Note: This is the most crucial step for email functionality.
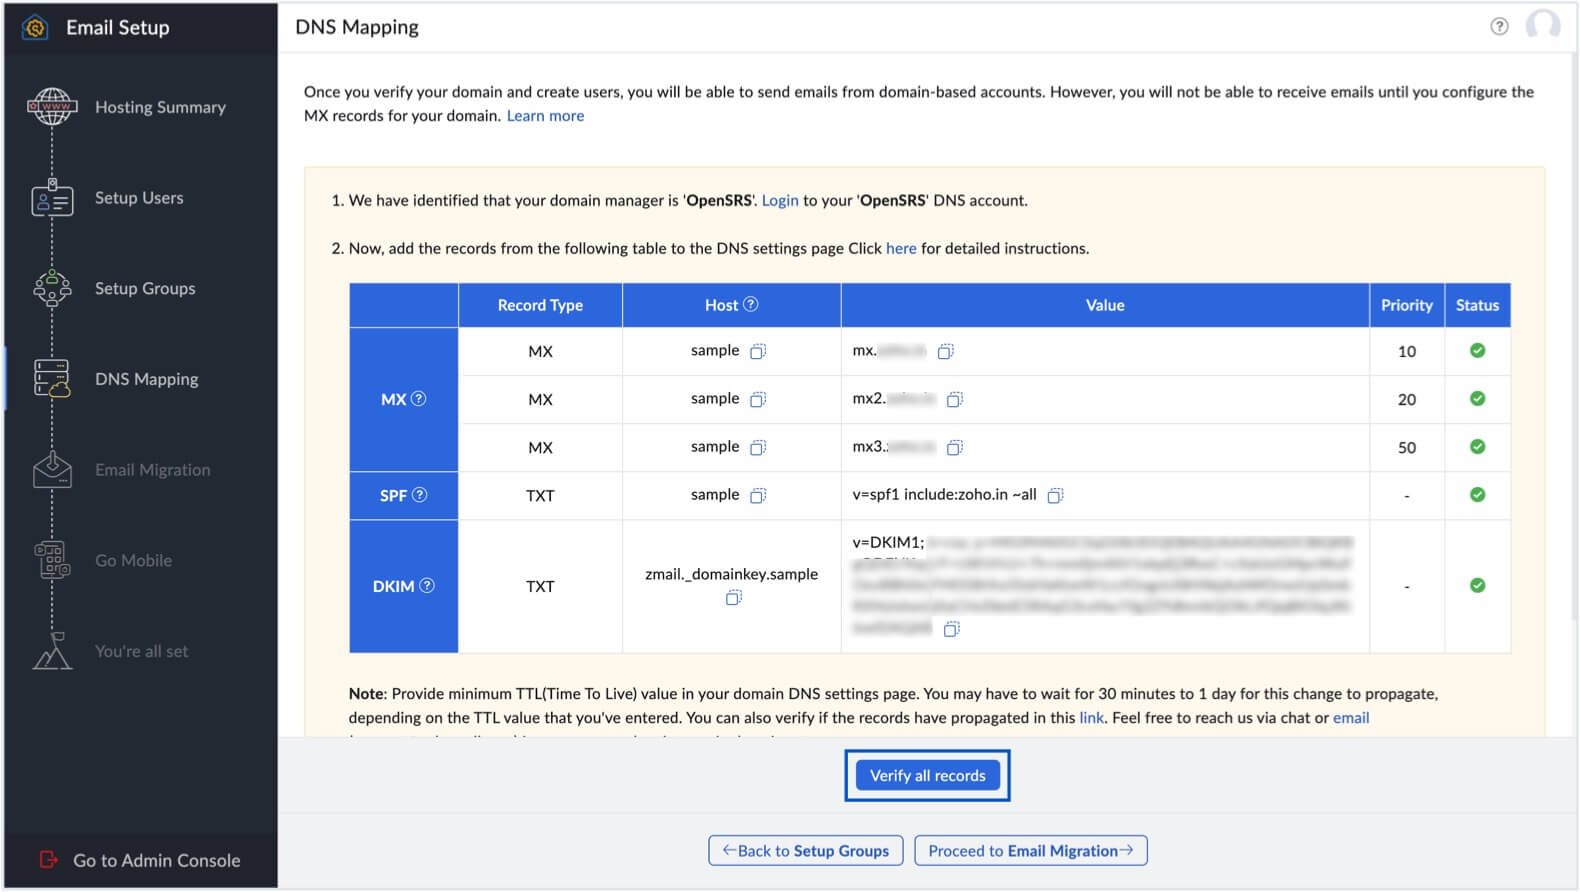
Configure MX Records (Mail Exchange)
Remove existing MX records first, then add:
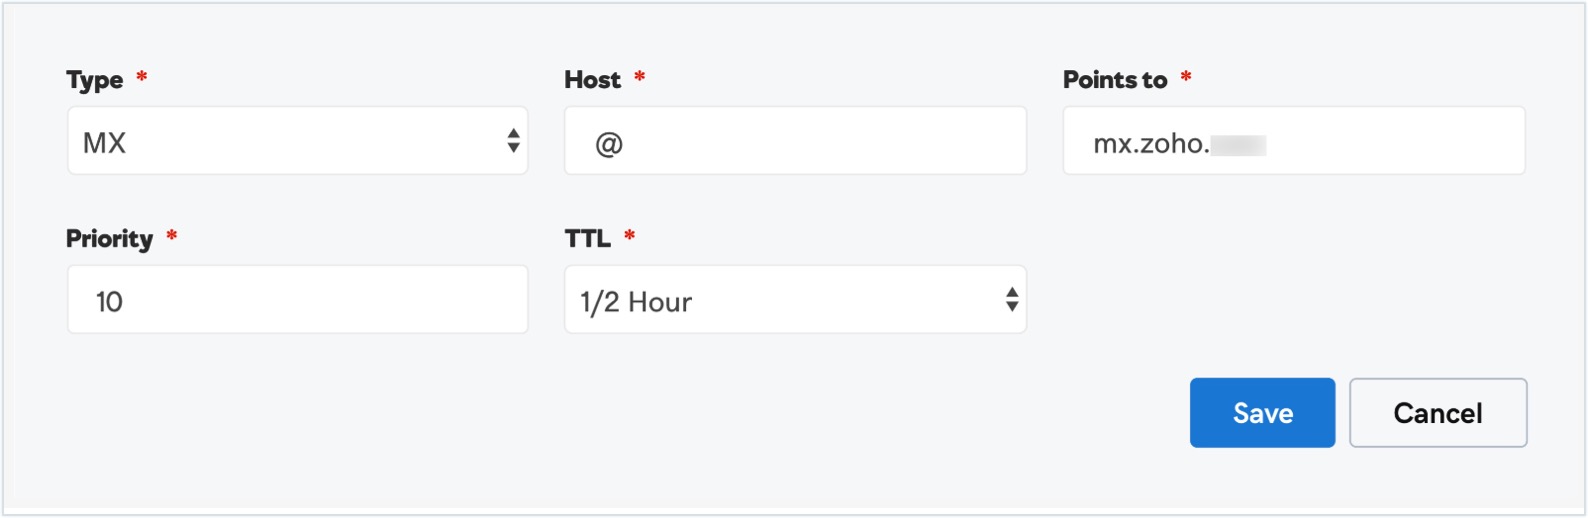
- First MX Record: Name/Host "@" or leave blank · Points to
mx.zoho.***· Priority 10 - Second MX Record: Points to
mx2.zoho.***· Priority 20 - Third MX Record: Points to
mx3.zoho.***· Priority 50
Add SPF Record (Prevents Email Spoofing)
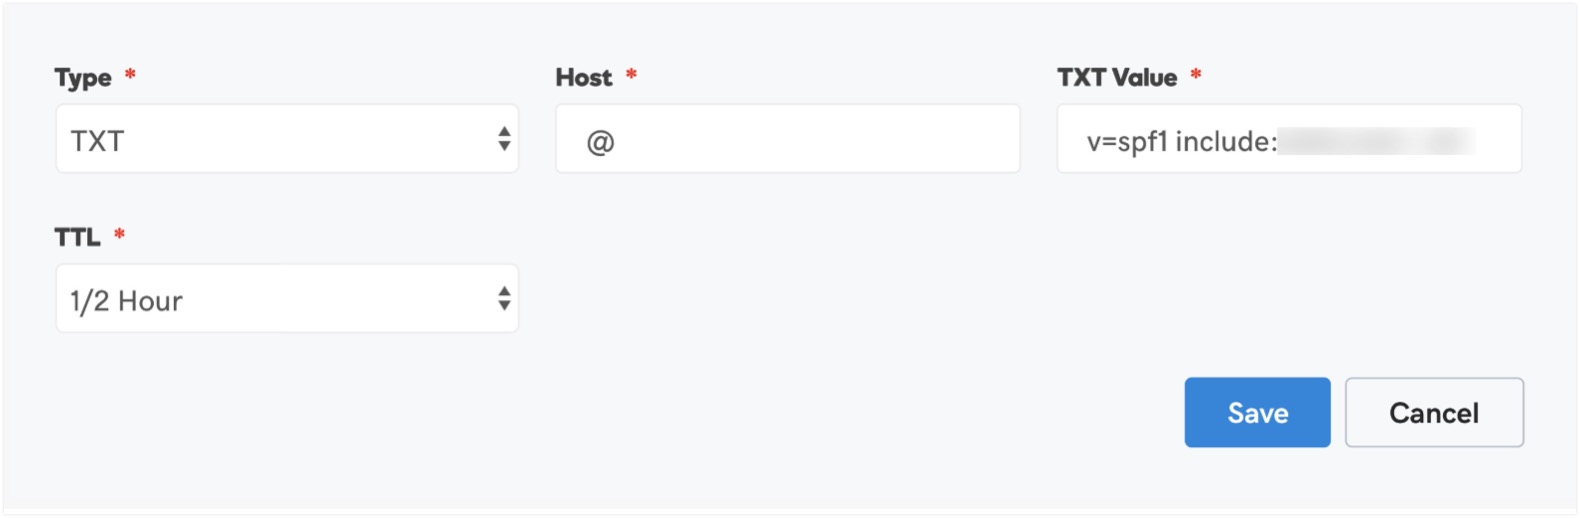
Create a new TXT record:
- Name/Host: "@"
- Value:
v=spf1 include:zoho.*** ~all - Note: Only one SPF record allowed per domain.
Add DKIM Record (Email Authentication)
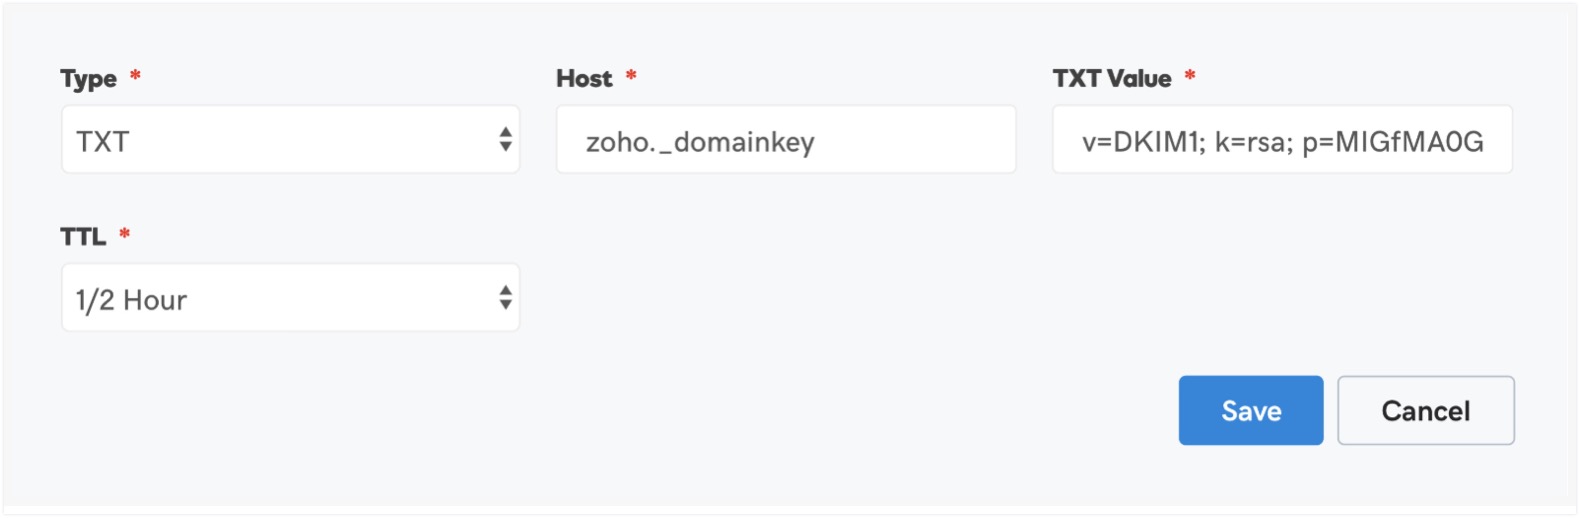
Create a new TXT record:
- Host:
zoho._domainkey(or custom selector) - Value: Copy the complete DKIM key from Zoho setup page (starts with
v=DKIM1; k=rsa; p=...)
Verification and Propagation Times
- MX Records: 1–2 hours for email delivery
- SPF/DKIM Records: 4–48 hours for full propagation
- Click "Verify All Records" on Zoho setup page after adding
Next Steps: Complete Your Professional Business Setup
Now that you've registered your official email, take the next step in professionalizing your business communications.
Get a Professional AI Phone Number
See how to get a professionally managed AI phone number for your business without having to buy a new phone line.
This tool allows you to:
- Get a dedicated business phone number
- Use AI-powered call management
- Maintain professional phone communications
- No need for additional phone lines or hardware